Understanding User and Role Permissions in ERPNext: A Step-by-Step Guide
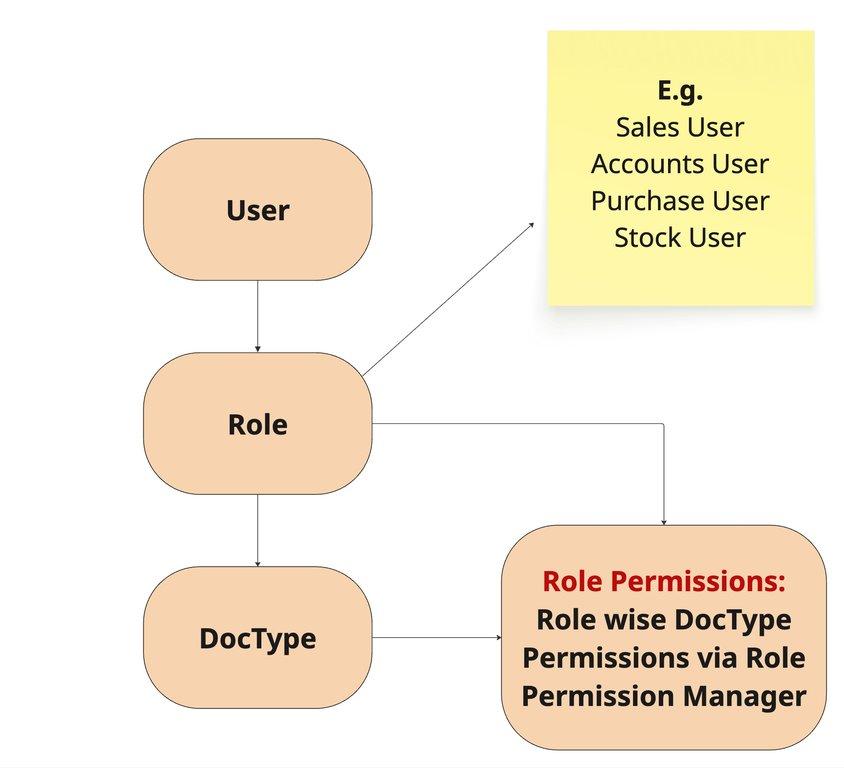
In ERPNext, every user is assigned a role, and each role has specific access to certain DocTypes. This structure ensures users only see and work with the data relevant to their job.
Basic Concept:
User: A person who logs into the system E.g.Sales User, Accounts User, Purchase User, Stock User etc
Role: Defines what a user is allowed to do E.g.Sales User can create Quotations and Sales Orders
DocType: Any module or document in ERPNext E.g.Quotation, Sales Invoice, Purchase Order
Role Permissions: Set through the Role Permission Manager, these control what actions (Read, Write, Submit, etc.) a role can perform on a specific DocType.
Flow Summary (as shown in the diagram):
A User is assigned one or more Roles
A Role defines access to specific DocTypes
Permissions are managed using the Role Permission Manager
This system ensures secure, role-based access throughout ERPNext.
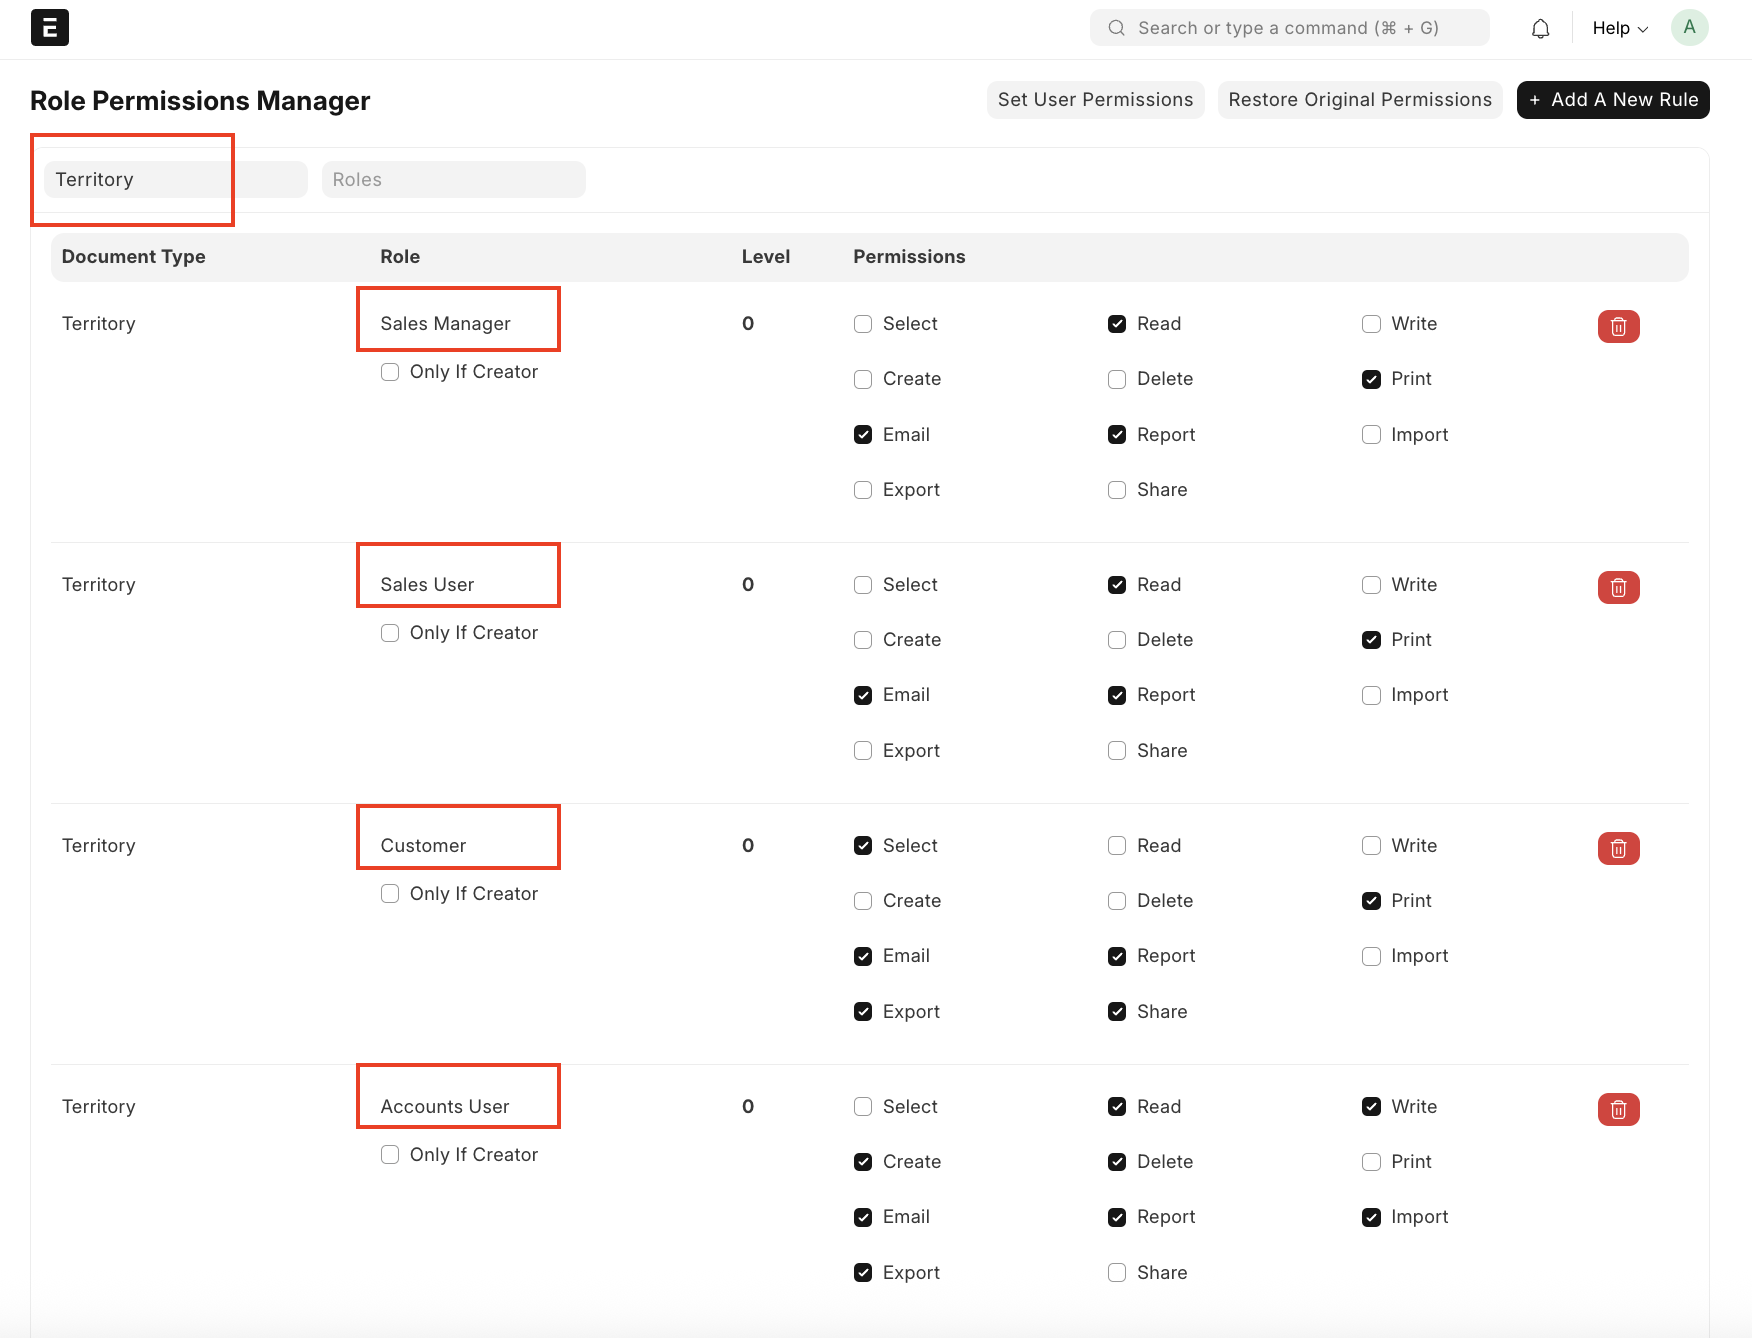
How Role Permissions Work in ERPNext
Once a role is assigned to a user, you control what that role can do using the Role Permission Manager.
🔧 What is the Role Permission Manager?
It is a tool in ERPNext used to define what actions a role can perform on a particular DocType — like Sales Invoice, Purchase Order, Customer, Territory etc.
| Option | What it allows |
|---|---|
| Read | View the document |
| Write | Edit the document |
| Create | Make new records |
| Delete | Remove records |
| Submit | Submit finalized documents |
| Cancel | Cancel submitted docs |
| Amend | Make changes after cancellation |
| Report | View reports |
| Export / Import | Download/upload data |
| Set User Permissions | Allow setting custom access for users |
| Share | Share document with others |
| Print or generate PDF | |
| Send document via email | |
| Only if Creator | Restrict access to records created by that user |
🔍 Let’s See a Use Case: Sales User Has Only “Create” Permission
🧑💼 Scenario:
Kanishka is a Sales Executive with the Sales User role.
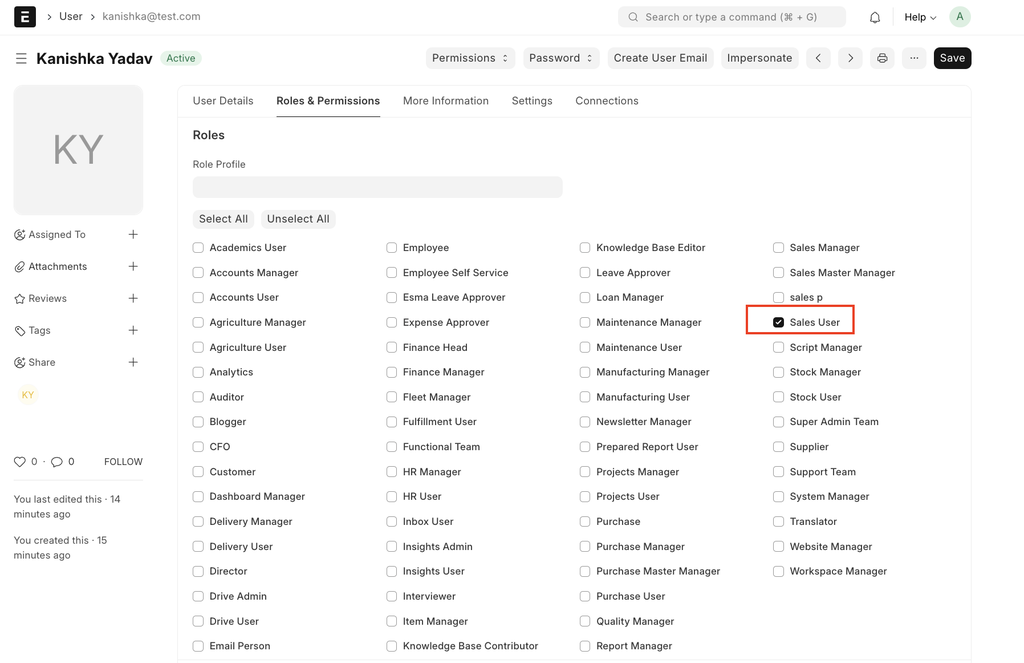
Currently, the role has only one permission for the Territory DocType:
✔ Create
❌ Read
❌ Write
❌ Others
Kanishka logs in and tries to open the Territory list, but receives an error message.

🧩 Why This Happened:
With only Create access:
User can open the form to create a new record But cannot view:
The list view
The record she just created
Any existing data
This causes an error when user trying to access the Territory.
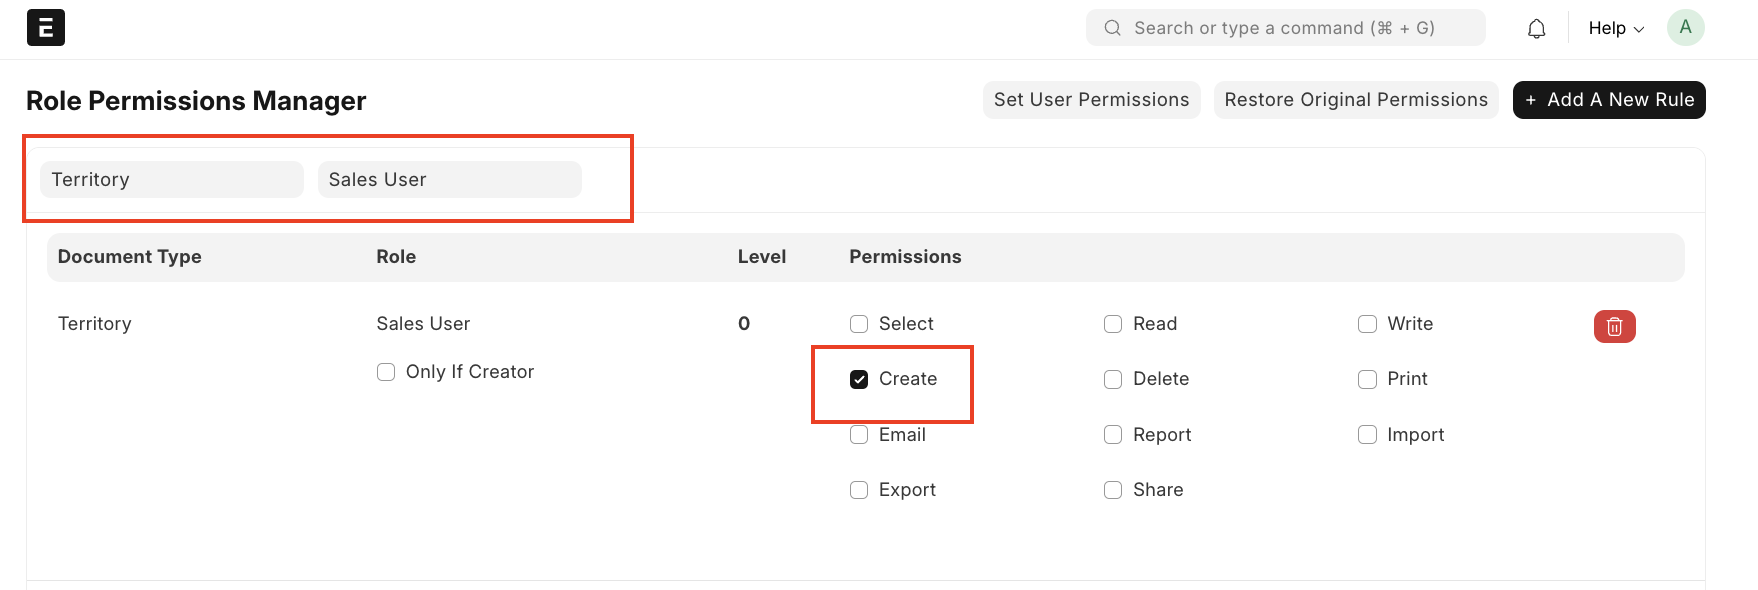
✅ Solution: Add “Read” and “Write” Permission
Steps to fix:
Go to Role Permission Manager
Select Territory as the DocType
Choose Sales User
Enable: ✔ Read ✔ Write
Save

🎯 Result: Now, Kanishka can:
View the Territory list
Access and edit her records
Create new Territories without errors
✅ How to Set Up User Permission
User Permission: Restrict the user to a specific value from a DocType. E.g.: Arun should have access only to the "Mumbai" Territory out of all Territories
Follow these simple steps:
Go to: User → User Permissions
Click on ➕ Add User Permission
Fill the following:
User: arun@test.com
Allow: Territory
For Value: Mumbai
💾 Save
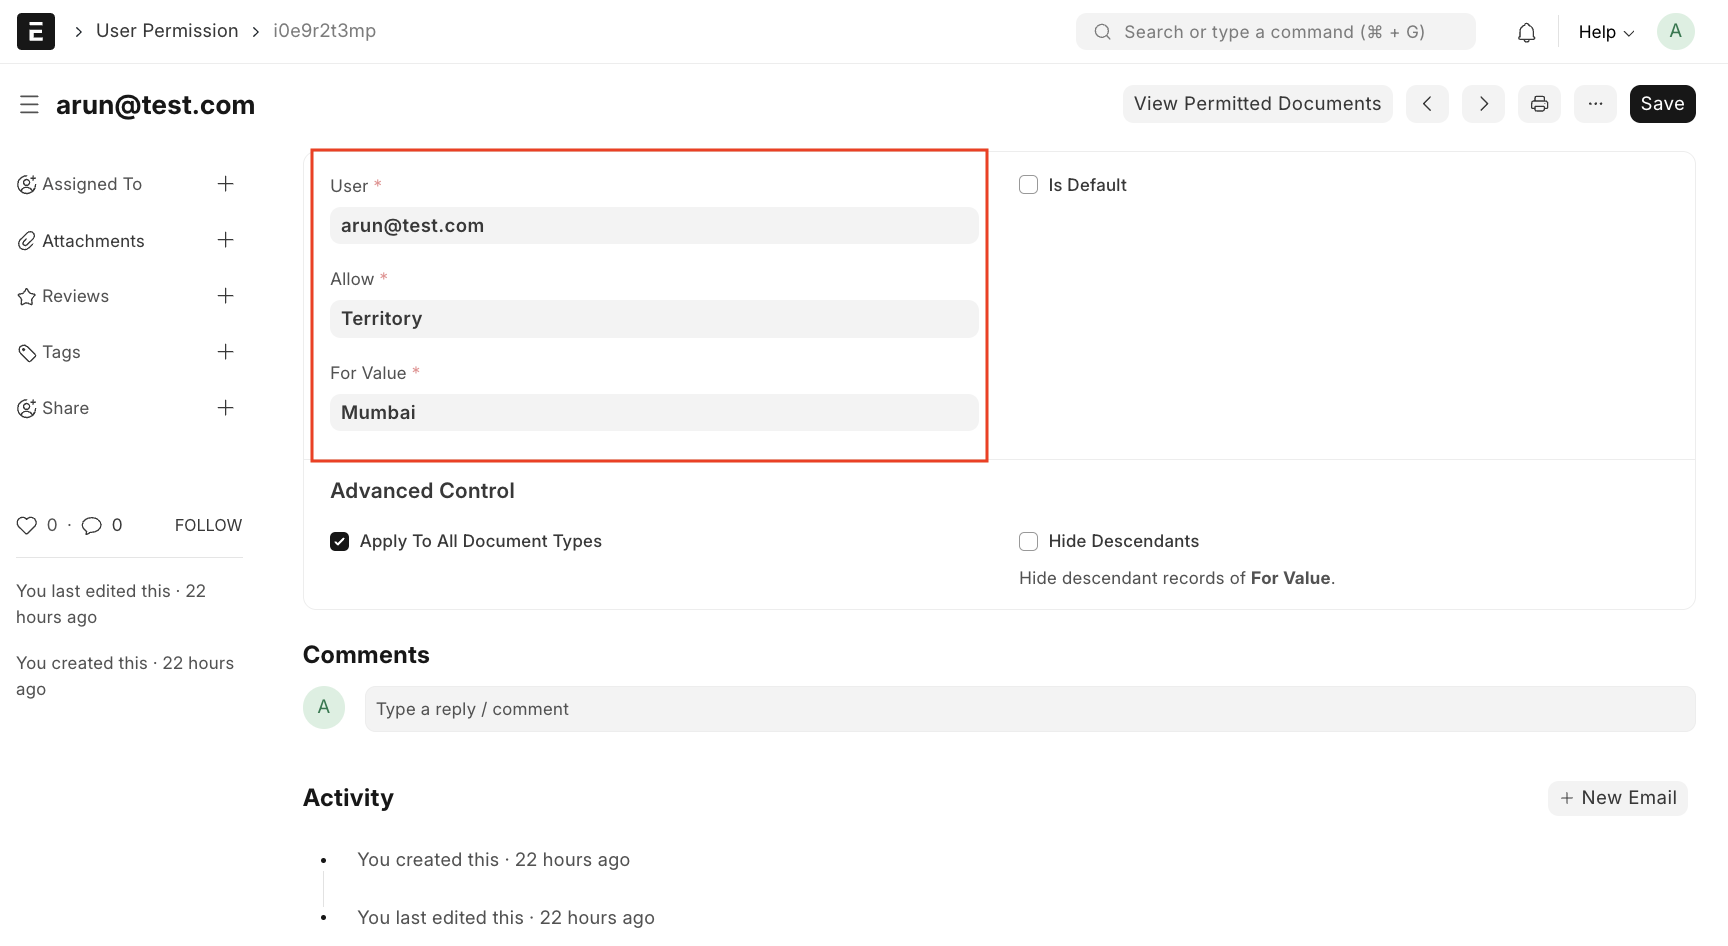
Now Arun is restricted to Mumbai only when using Territory fields.
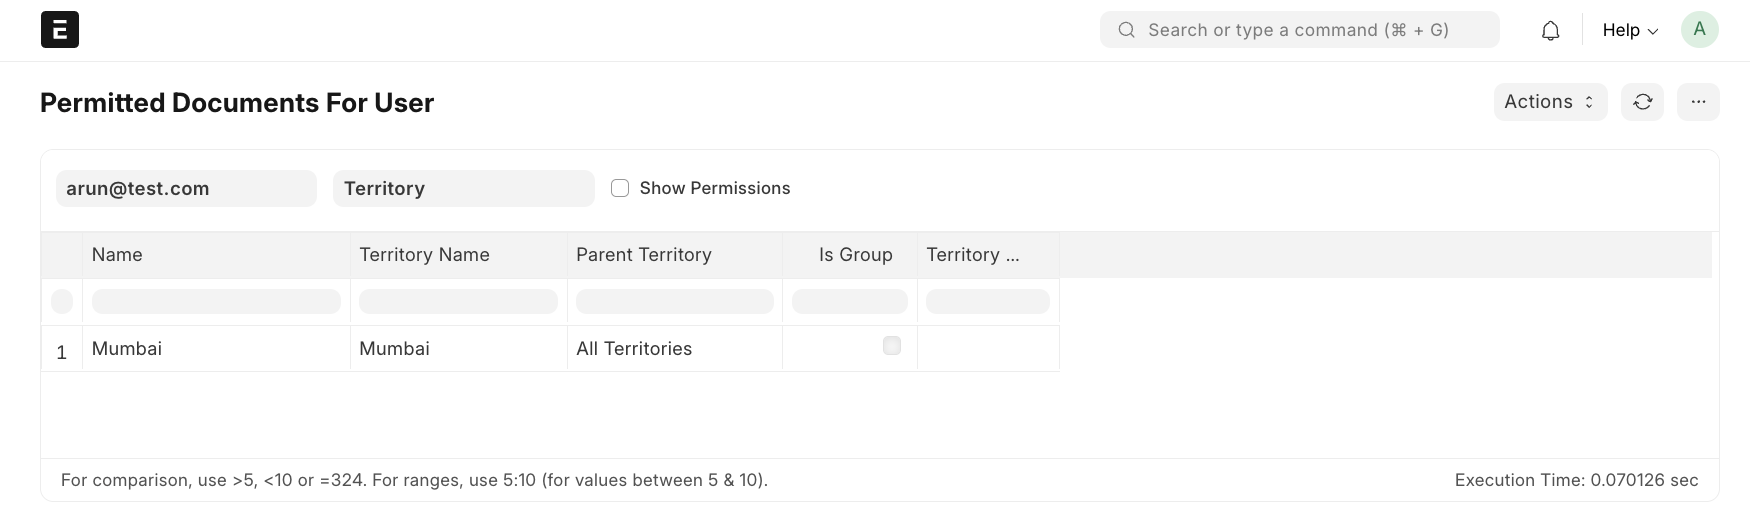
🔍 How to Verify: Open the report: Permitted Documents for User
Enter:
Doctype: Territory
User: arun@test.com
✅ Result: It will only show Mumbai in the list
🎯 Benefit: This makes sure your users only work on the data relevant to them. No confusion, no unauthorized access. Helps maintain clean workflows, data security, and department-wise separation.
✅ Conclusion
Understanding and configuring User, Role, and Permissions in ERPNext is essential to maintain data security, ensure role-based access, and support smooth business operations.
With:
Role Permissions, you define what a role can do (Read, Write, Create, etc.)
User Permissions, you control which records the user can access
Properly setting these ensures that:
Users only see what they’re meant to
Errors are avoided
The system remains clean, secure, and efficient
🔐 Right Access for the Right People — that’s the power of ERPNext Permissions!